Shower Trough
A lidded acrylic trough for cuttings on shower glass, with swappable tiles
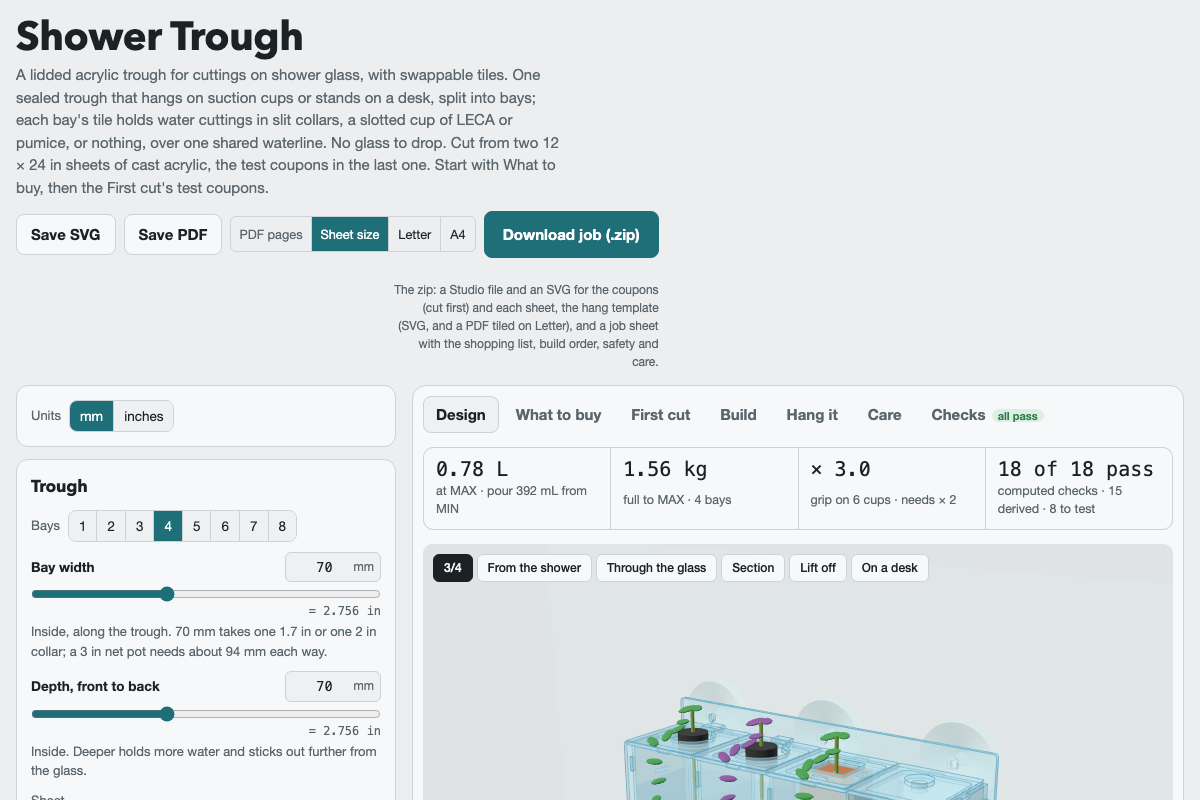
Screenshot of the tool as it opens; it is a real capture, not a mockup.
Thanks, your report was sent.
Report a problem or a newer version
What it makes
A zip with everything to cut and hang one trough: an xTool Studio .xs file and an SVG for each sheet and for the test coupons (cut first), a 1:1 hang template as SVG and as a PDF tiled on Letter, and a plain-text job sheet with safety, the shopping list, the parts, the sheets and their layers, the build order, the sealing schedule, the hand tests, hanging, care and every check. Each .xs opens in Studio with its layers named with their settings and set to run by layer. Save SVG and Save PDF give the sheets, the coupons and the hang template on their own: SVG for other software, PDF at 1:1, either one page per sheet or tiled on Letter or A4.
How to use it
- Start on What to buy: it lists the suction cups, acrylic, cement, collars, medium and care supplies in the quantities your design needs, with links and what to measure when they arrive. Save the list as text for your phone.
- Measure your cast acrylic at five points with the masking peeled at the corner and enter the largest; enter the kerf. The Units switch takes every length in mm or inches. Cut the coupons on the First cut tab first, pick the tab fit from the comb, and read the real kerf from its 12 mm tongue.
- Under Trough, pick the bays, their width and the depth, and the sheet: 12 × 16, 12 × 20 or 12 × 24 in, 300 × 400 mm, or your own. More bays than the sheet's length holds step the sheet up, with an offer to keep it and narrow the bays.
- Under Tiles, make the lids you want (holes for collars or net pots, a mineral cup, or blank, with an optional fill port and back tongues) and pick one for each bay on its card or by clicking a bay under the 3D view. Anything that doesn't fit says why on its card, with one-click fixes.
- Under Suction cups, pick the cup and how many; the buy line says how many to order and the summary shows the grip at MAX. Stud cups take any sheet; a mushroom cup whose neck is too short for your sheet is refused. If your cups measure differently, pick Custom and type what you measured.
- Download the job, cut the sheets, and build in the order on the Build tab: anneal, assemble square, weld with Weld-On 4, fillet every wet seam with Weld-On 40, leak-test 48 h, then fit the lid frame and cure. Put the cups on the trough on the bench, press it onto the template from the Hang it tab, then follow the Care tab.
Build notes
- Water cuttings hang deep in slit collars; the mineral cups' medium sits 25 mm under MAX and 5 mm under MIN in the same water. No potting soil in shared water.
- The grip is each cup's published rating × 0.25 for wet glass; the checks want a safety factor of 2 at MAX and 1 at the overflow or with the worst cup lost. Ratings, friction and creep are untested until the jug test and the full-load hang.
- The default cup is the Adams Large Cup with #8-32 Stud & Nut (6001-83-9300), sold by the 50. Adams' and Kinter's Premium mushroom cups have a 2 mm neck that can't seat on any sheet this tool cuts, and Kinter's Standard cups are sold only to dealers, so the page says so.
- Silicone doesn't bond to acrylic, so the seal is the cement. Below the water only the floor's tabs pass through the walls, all on the one corner the fillet covers.
- The end walls run down to the back wall's bottom edge as legs, so off the glass it stands flat on a desk or shelf. Full, a half-kilo tug on a vine tips it; keep it back from edges.
- Seat collars and tiles on the bench; once hung, tiles only lift out. It's not a grab bar.
- No fit, cup rating or laser setting has been cut yet; they are starting points until the coupons are.
- Works fully offline once opened; nothing is fetched. The shopping links open the shops in a new tab.