Sunglasses Holder
A wall ladder of walnut noses and ear bars for your sunglasses, as Studio jobs
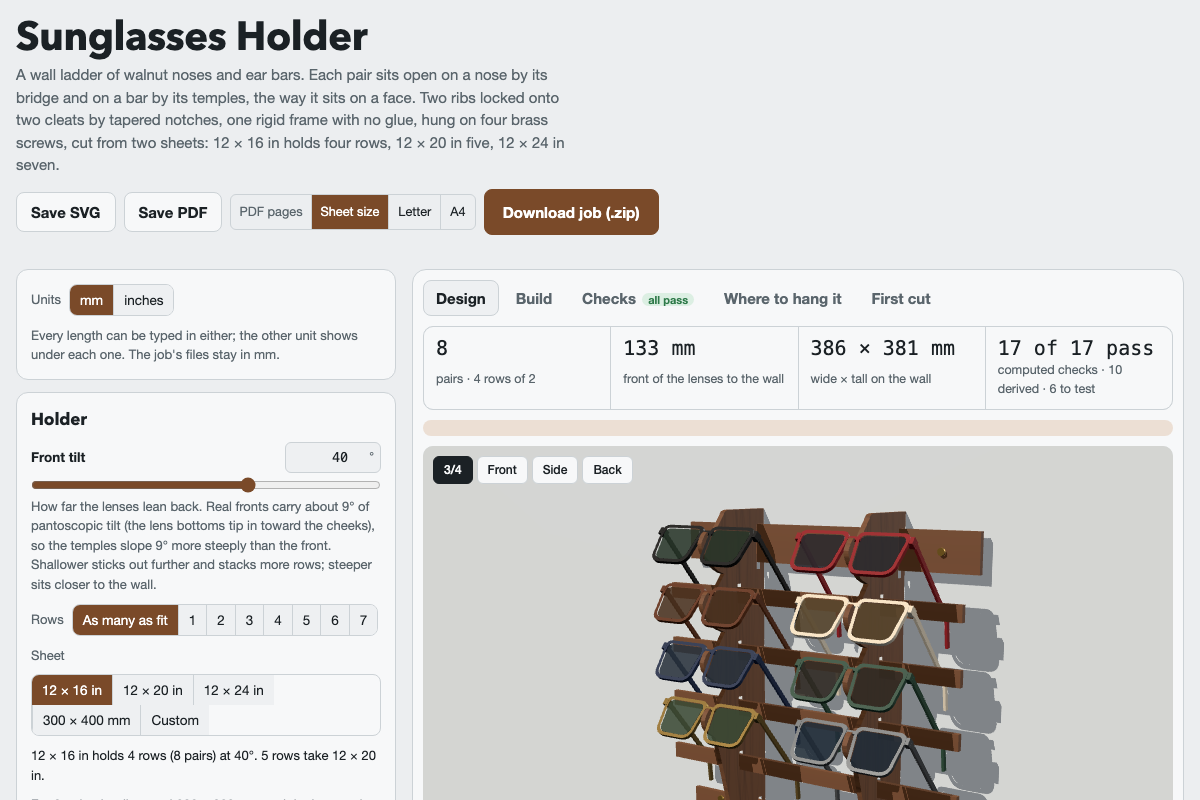
Screenshot of the tool as it opens; it is a real capture, not a mockup.
Thanks, your report was sent.
Report a problem or a newer version
What it makes
A zip with everything to cut one holder: an xTool Studio .xs file and an SVG for the rib sheet and for the bar and cleat sheet, and a plain-text job sheet with the parts, the four hole centres and their heights above the floor for your wall, the drill, anchor and screw to use, the orientation rules, and the assembly steps. Each .xs opens in Studio with its layers named with their settings and set to run by layer. Save SVG and Save PDF give the two sheets on their own: SVG for other software, PDF at 1:1, either one page per sheet or tiled on Letter or A4 to print a paper template.
How to use it
- Measure your widest front and longest temple and enter them; the checks sweep an envelope up to those.
- Choose what the ribs and what the bars and cleats are cut from (walnut by default; any of the four sheet materials), and measure both sheets at five points; enter the largest readings. The Units switch takes every length in mm or inches. Every window and notch is cut the fit wider than what you type; cut the test strip on the First cut tab before a full sheet and pick the fit from its window ladder.
- Under Holder, pick the rows and the sheet: 12 × 16, 12 × 20 or 12 × 24 in (4, 5 or 7 rows at 40°), 300 × 400 mm, or your own size. Ask for more rows than the sheet holds and it steps up to one that holds them, or offers a shallower tilt that fits them on the sheet you have. The readout under the sheet shows the smallest sheet each half of the job needs and can shrink yours to it, and a line under the summary says what every change did. Under Cut from a board, enter the board you have: it finds the most pairs whose two sheets come out of it, draws the cuts and the test-strip offcut, and fills in the sheet size. Solid wood keeps its grain along the board; ply and acrylic may be turned.
- Set the front tilt. Steeper sits closer to the wall and stacks more rows; the Checks tab shows where the sheet runs out.
- Enter the top-row height for your wall and the wall type; the job sheet gives the four hole heights, 300 mm apart, with the drill, anchor and screw to use.
- Download the job, open each .xs in Studio with the right sheet, and build in the order on the Build tab: finish the parts flat, drop the ribs onto the top cleat, then the bottom cleat and the bars onto the ribs, tapping each joint home, and lower the frame onto four brass screws.
Build notes
- The checks sweep fronts 130–160 mm wide and 40–60 mm tall, temples 135–150 mm with curls 25–40 mm at 30–45°, pantoscopic tilt 6–12°, and 7° of temple splay. Only the computed group can fail; the derived group lists what the layout solved for; the untested group can only be settled on the bench.
- Every joint is the same tapered notch: it opens the fit wider than the rib and narrows to 0.3 mm under it, so tapped home it grips with no play and stays, with no glue, wedges or stacked layers. The ribs hang from the top cleat; the cleats are single boards held off the wall by the ribs; the ear bars tap out, and they are the fuse, breaking before a rib or cleat does.
- Grain runs along the rib's height and along every bar and cleat. Buy the sheets with the grain along the long side.
- No fit and no laser setting has been cut yet; they are starting points until the test strip is.
- Works fully offline once opened; nothing is fetched.
Versions
The site runs the newest. Every earlier version stays downloadable, unchanged, for builds already under way.